This is the larger centerpiece version of the armadillo cake. It uses two 9×13-inch cakes. For the original one-pan recipe, see the small home version.
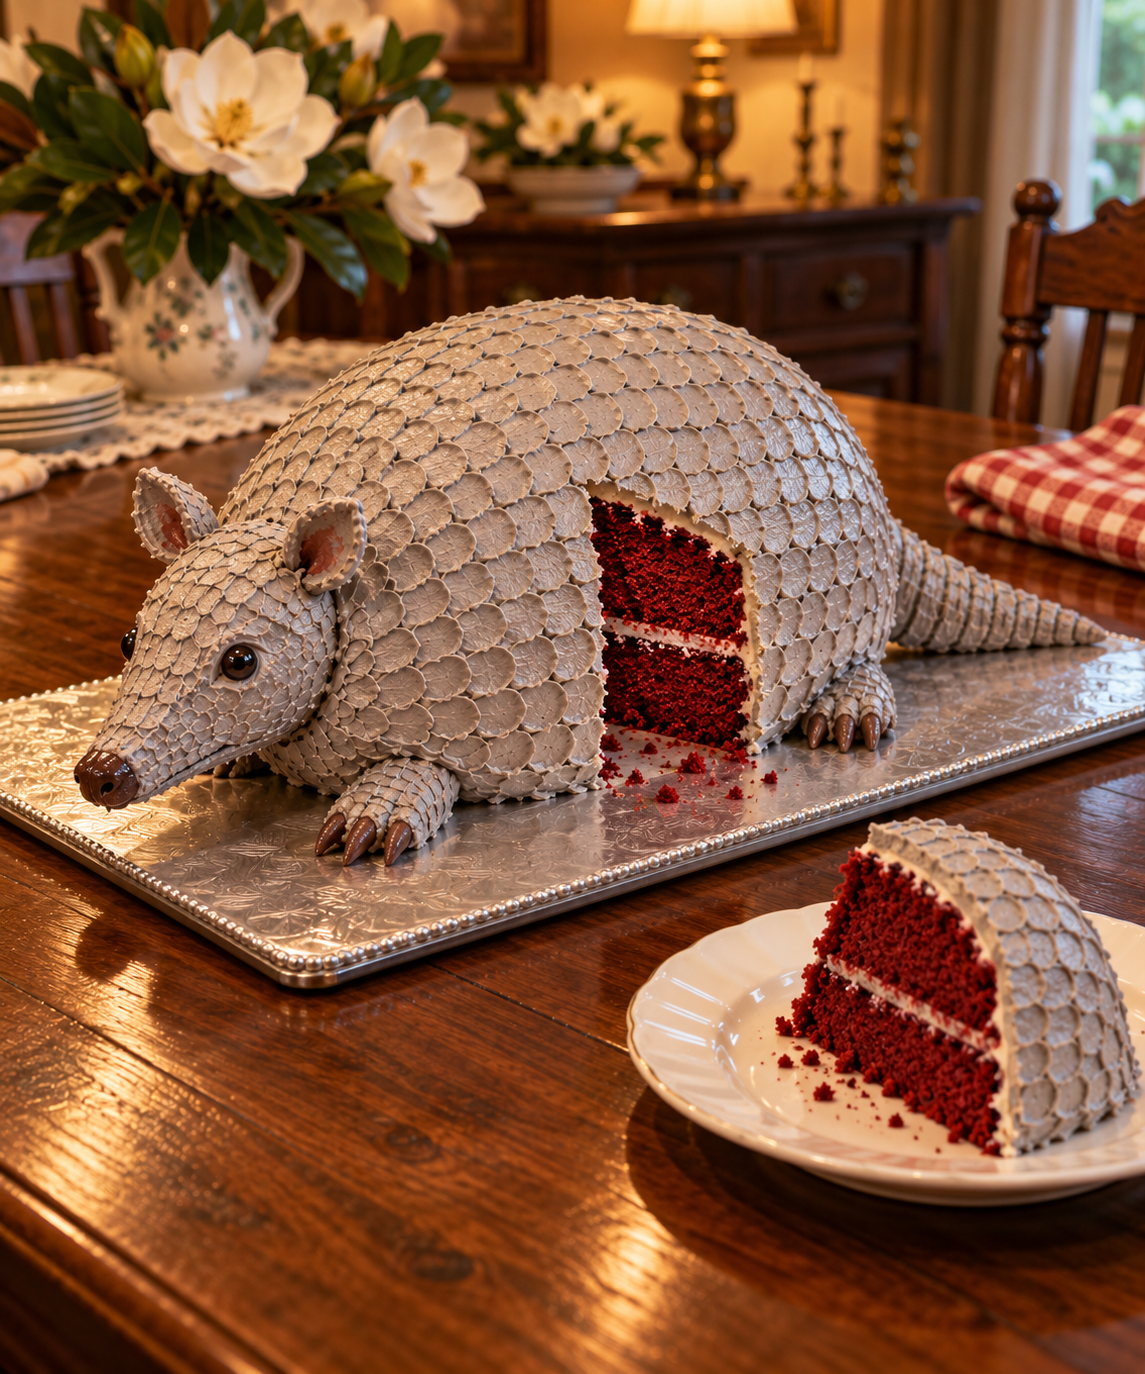
Large Steel Magnolias Armadillo Cake (Two 9×13 Cakes)
Course: DessertCuisine: SouthernDifficulty: Intermediate25–30
servings1
hour30
minutes55
minutes10 hours 25 minutes
minutesKeep the screen of your device on
Ingredients
- Red Velvet Pound Cake (Two 9×13 Pans)
3 cups unsalted butter, softened
5 cups granulated sugar
10 large eggs
6 cups all-purpose flour
4 tbsp cocoa powder
1¾ cups buttermilk
2 tbsp vanilla extract
3 tbsp red food coloring
1½ tsp salt
1 tsp baking soda
2 tsp white vinegar
- Gray Vanilla Buttercream
2 cups unsalted butter, softened
6–8 cups powdered sugar
4–6 tbsp milk or cream
2 tsp vanilla extract
Black gel food coloring, a tiny amount
- Optional Support and Decoration
Food-safe cake dowels or thick straws, only if needed
Directions
- Make and Bake the Cakes
- Preheat the oven to 325°F. Grease and flour two 9×13-inch metal pans.
- Prepare the doubled batter in two batches so it mixes evenly. Cream butter and sugar until light and fluffy, about 3–4 minutes.
- Add eggs one at a time, beating well after each addition.
- In a separate bowl, whisk flour, cocoa powder, salt, and baking soda.
- Add dry ingredients alternately with buttermilk, beginning and ending with dry ingredients. Mix just until combined.
- Stir in vanilla and red food coloring. Add vinegar last and mix just until combined.
- Divide the batter evenly between the two pans and smooth the tops.
- Bake at 325°F, rotating the pans between racks halfway through. Begin checking at 45 minutes; bake until a toothpick inserted in the center comes out clean or with a few moist crumbs, about 45–60 minutes.
- Cool completely in the pans. Cover and chill both cakes for at least 8 hours or overnight before carving.
- Make the Gray Buttercream
- Beat the softened butter until creamy. Gradually beat in powdered sugar, then add vanilla and enough milk or cream for a spreadable consistency.
- Add a tiny toothpick-tip amount of black gel coloring. Mix well, let rest 5–10 minutes, and adjust slowly until light gray.
- Stack and Carve
- Place one chilled cake on a sturdy cake board. Spread a thin layer of buttercream over it, then place the second cake on top. Keep the board underneath the cake, not between layers.
- Carve the stacked cakes into a broad rounded body, trimming a little at a time. Use scraps mixed with a little buttercream to shape the head, snout, feet, and tail.
- Attach the shaped pieces with buttercream. Add food-safe dowels or thick straws only if needed; count them, mark their locations, and remove all supports before serving.
- Finish the Shell
- Apply a thin crumb coat over the cake and chill until set. Add the final gray buttercream coat and use a fork or spoon to make overlapping scale marks.
- Keep the finish rustic. Chill the finished cake until the frosting is firm, and check that all supports are removed before slicing.
Yield: About 25–30 servings, depending on how much is trimmed during carving and how large the slices are. Cake serving guides vary, and carved cakes can lose some portions.
As an Amazon Associate I earn from qualifying purchases.
Leave a Reply